Monday, 10 December 2012

Audience research + evaluation

1) Who are the audience?

2) How are particular groups represented? - PORTRAYAL of females portrayed. gender, ethnicity, fans of country pop music; youth -positive/negative?

3) Which elements does you like?

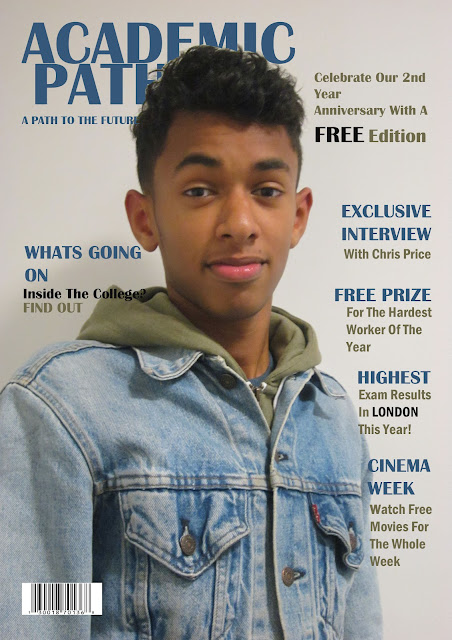
4) what could have been improved on my magazine front cover, contents page and dps?

5) Look at my college magazine. How have my technical skills in Photoshop + InDesign, improved?

Friday, 7 December 2012

What i know about the photography studio and what i have done for my photography

For our photography, we have learnt a few things about the studio and the equipment.
before taking a picture in the studio, you first of all need a background which is called a backdrop which could either be white or black, colourama. there is nothing worse than having a busy background in a studio. There is to be 2 flash lights called the trinity. The reason there are trinities is so it freezes an object. using the studios main light is not always neccessary. When i was in the studio i have used a white black drop and took the pictures with the lights turned off. Having the light turned off has given my background a smoother look rather than having a full white background. There was soft boxes in the flashlights (trinity) which is grided. This diffuses the light. It helps the shadow bounce off the face and the shadow dissapears. It also creates a perfect symmetry of light. I have learnt that the poly board bounces back light onto the model and gives a shadow to the face. it was in the shape of a circle. the reflector board was also in shape of a circle, however it has a different function. it has a gold, and a silver side. the silver side of the reflector gives a sharper tone to the face while the gold side gives a warmer tone to the face.
Having the model close to the background may make the model blend in with the background making them look like they have a floating head. This is why it is important to have the model closer to the camera and inbetween the 2 flashlights.
The soft boxes light could get brightened. the lowest brightness is 1 and the highest it brightens up to is 6. This could be used to make the face have more shadow or less shadow by having it brighter.
for my

the final look of my DPS


the final look on my DPS

carrying on improving my DPS


still carrying on improving my DPS. i have added page numbers, the cp website and the logo on the corners of the pages. i will now be making the 'EWA LUC' writing larger

Wednesday, 5 December 2012


i have finally finished my contents page

last but not least i will be adding 4 more pictures onto my contents page and i am finished

contents mage finishing slowly


nearly finished my magazine contents page.

magazine contents page progress


this is my magazine contents page so far. i will be adding more pictures and writing more on the right side

Monday, 3 December 2012

These are some pictures i have decided for the front cover before deciding a final picture

I didnt choose this one (above) because it was landscape mode and her pose was slightly too plain

 I didnt choose this picture (above) because it was also landscape and was too exaggerated with her arms on her hips. it would also take up alot of space if it was to be on the front cover and wouldnt look very appealing if it was cropped because half her arms would have dissapeared.

This picture (above) wasnt an appropriate picture for a front cover either because her hair wasnt in the right shape and possition.

The final picture (above) is the exact picture i was looking for. this is because her hair has a slight wind blow to it and has the perfect pose. everything about the picture fit my genre and how i wanted it to look
This picture (above) is of the model on the front cover before i have edited it to get rid of her spots and crop it.


This is the edited version of my model on the front cover (above) the front cover has to look flawless because its the first thing the buyer sees when they pick up the magazine. i believe she looks flawless now, without her spots visible


i have finally finished my magazine front cover. i will be identifying what i will have to improve
on in my evaluation


doing my final touches on my magazine front cover


slowly finishing my magazine front cover


the progress on my new magazine projects front cover so far

improved version of my magazine front cover


An improved version of my magazine front cover

Thursday, 22 November 2012

Presentation showing my ideas of my magazine front cover, contents page and dps


Regulars will include:
Celebrity quizzes, cross words and album reviews
 
Interviews:
Celebrities interviewed by questions asked by fans on social networking sites (Twitter/Facebook)


Friday, 12 October 2012

what ive learnt about adobe photoshop so far

what ive learnt about adobe photoshop so far

to open a new page in adobe photoshop you go you click file on the top left of the page, then new - preset - international paper - size: A4 after doing all of these steps you click OK.

the size i worked on was 16.7 (it shows it at the top of the programme) you can enlarge the page by pressing CTRL + ALT and + together. you can also make the view of the page small by CTRL + ALT and - at the same time.

when you get your new page, you will not be able to do anything with it yet. this is because the layer is locked. if you look on the right hand side of the layer box, you will see there is a picture of a padlock (the colour of the padlock is yelloe) you double click and press OK to unlock it

to get constuction rulers (helpful to not go out of line so the wiring could look in proportion) you go on view again on the top left. you then click on rulers and it should come up.

you then click on the ruler on the left side, you click and drag the ruler to 1.

you again click on the ruler on the left side and drag it to 20

after youve set both your verticle rulers, you drag your horizontal rulers into place
to do this you go to the top ruler, and drag it to 28.8

then you can go on file and save-as and you save it as a photoshop file if you are not finished using photoshop.

note:  CTRL + T allows you to stretch the picture you have added (selects) when you click SHIFT and click the right corner of the picture, you could enlarge the picture

to add a masthead, click the 'T' in the tool box.

if you click the text layer a window pops up, click cover overlay then click the rectangular colour box, then you could pick a colour you like

opacity shows the transparence of the picture, text etc


Wednesday, 10 October 2012

Media kit for the 'UNCUT' magazine

This is my analysis of the uncut magazines media kit

Media pack for 'Q' mag

This is a media kit i have analysed for the 'Q' magazine. It involves analysing the percentage of readers etc

The analysis of the Q magazine

This is my analysis for the front cover, dps and contents page of the 'Q' magazine

Analysis of the uncut magazine

This is my analysis of the front cover, dps and front cover of the 'UNCUT' magazine

Tuesday, 9 October 2012

production schedule for music magazine


this is my production schedule for my second project on my music magazine

Sunday, 7 October 2012

My magazine front cover finished


My magazine front cover is completed. i will now start doing my contents page on InDesign 

Friday, 5 October 2012

Thursday, 4 October 2012

The progress on my magazine front cover


this is my progress of my magazine front cover. i will add a few more writings to it, maybe one more picture and finally move onto designing my contents page on InDesign

Wednesday, 3 October 2012

Tuesday, 2 October 2012

The progress of my magazine front cover


This is what i have done for today for my magazine, i will finish this of tomorrow and start my contents page by friday the 12th oct. 2012

Monday, 1 October 2012

Tuesday, 25 September 2012

This shows the tasks set for my project and when it should be handed in by


Wk. 1
Mon
Tues
Weds
Thurs
Fri
Sat
Sun


Start Task 1 on production schedule
 
Task 1 production handed in and uploaded
 
Start Task 2 case studies


Wk. 2
Mon
Tues
Weds
Thurs
Fri
Sat
Sun


 Task 2 case studies handed
 
Start Task 3 on the college magazine


Wk. 3
Mon
Tues
Weds
Thurs
Fri
Sat
Sun
 
Task 3 College magazine handed
 
Start Task 4 audience feedback & evaluation


Wk. 4
Mon
Tues
Weds
Thurs
Fri
Sat
Sun


Task 4 Audience feedback & evaluation handed
 
Start Task 5 magazine newsstand


Wk. 5
Mon
Tues
Weds
Thurs
Fri
Sat
Sun


Task 5 Magazine newsstand handed
 
Start Task 6 audience research


Uploaded proposals house styles, draft copy etc
 
 
Wk. 6
Mon
Tues
Weds
Thurs
Fri
Sat
Sun


Task 6 Audience research blogged
 
Start Task 7 plan and shooting


Wk. 7
Mon
Tues
Weds
Thurs
Fri
Sat
Sun


Show rough draft of three pages to class
Task 7 plan and shooting complete
 
Start Task 8 Construction
 
 
Wk. 8
Mon
Tues
Weds
Thurs
Fri
Sat
Sun


Task 8 Construction uploaded to website
 
Start Task 9 audience research – main task
 
 
Wk. 9
Mon
Tues
Weds
Thurs
Fri
Sat
Sun


Task 9 Feedback completed
 
Start Task 10 evaluation


Wk. 10
Mon
Tues
Weds
Thurs
Fri
Sat
Sun


Wk.11
Mon
Tues
Weds
Thurs
Fri
Sat
Sun


Wk. 12
Mon
Tues
Weds
Thurs
Fri
Sat
Sun


Task 10 Evaluation questions answered and uploaded to blogger